Setting up OpenVPN on Android
1. Download and install the app ‘OpenVPN for Android’ from the Google Play store. Be sure to pick this exact application as there are other versions available that may not work.
2. Download the SurfBouncer configuration files from the link in your setup email.
Extract the files to a folder on your computer so you have access to them.
3. For most types of Android devices, you connect the device to your computer with a USB cable. Then, use finder for the Mac or access it on your Windows PC like an external drive. You will want to copy the configuration files to your android device and put them on the device’s SD card. You will see that when you connect the device with the USB cable.
This is how it looks on a Mac:

First, create a folder named ‘OpenVPN’
Drag and drop the files from the folder you created in step 2 to the OpenVPN folder you created on the Android device.
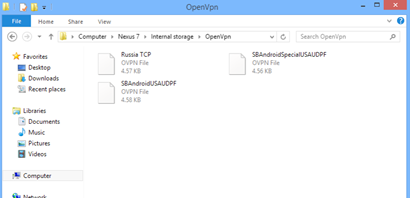
This is how it looks on a Windows computer:

When you look at the OpenVPN folder, it will look like the image below. Again, just drag and drop the files from the folder you created in step 2 to the OpenVPN folder you created on the Android device
Once the files are on your Android device, load the ‘OpenVPN for android’ application and you will see this screen:

Touch ‘VPN Profiles’ and this screen will appear

Touch ‘IMPORT’ to bring in one of your profiles
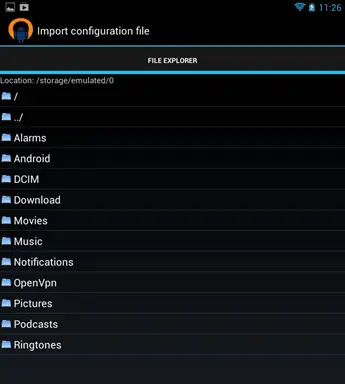
Touch the folder where you copied the configuration files. On this device, we put them in a folder called ‘OpenVPN’
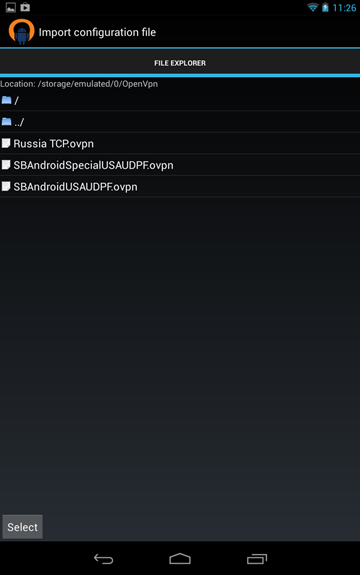
Choose the configuration you’d like to add then touch ‘Select’ at the bottom of the screen
The next screen will show this:

Touch ‘IMPORT’
You’ll now see this screen for the configuration you just imported:

Touch ‘Basic’ and then you’ll want to make a couple of changes:

Change ‘Type’ to User/PW
Then add your user id and password as shown below

This is what the screen looks like after you add your user id and password:

Press the back button on your device to make a change to routing
On the routing option, check the ‘Use default Route’ box
Use the back button again

Then choose the encryption option, and then TLS direction. Choose 1 and then press the back button
Push the back button again to get to the Profile.
You may see this screen the first time you choose to connect with a profile:

Choose ‘I trust this application’ and then ‘OK’
When you touch the new profile you created, this screen will appear:

You can now connect to the VPN location you just set up
When connected, you’ll see the connected icon in the upper left
If you don’t get a connection, you can send a log to our support with your email account. The address is info@surfbouncer.com.
The log is accessed from the upper right menu and then touch ‘Send log file’

You can now import any more of the files you wish to use in the same manner
NOTE:
Recent versions of Android have changed the default cipher settings. On devices with the latest version of the operating system you may also have to set the correct cipher as shown below.
